Pattern

It’s a new year – and I have scheduled some blog time

Hi everyone,

December FLEW by.  Between Community Chorus concerts and rehearsals, music rehearsals for church, family needs (many doctor appointments and an outpatient surgery for one) and preparing for Christmas some things had to “give.”  The house and the blog were the two that “gave” the most.  The house is slowly returning to tame,  so now if the time to bring the blog back into repair.

Way back in September our monthly group started learning/relearning some fun folds for cards.   Thankfully at that time I did some research and prepared for the next few months of projects.  Now it is time to share with you those instruction sheets & cards.
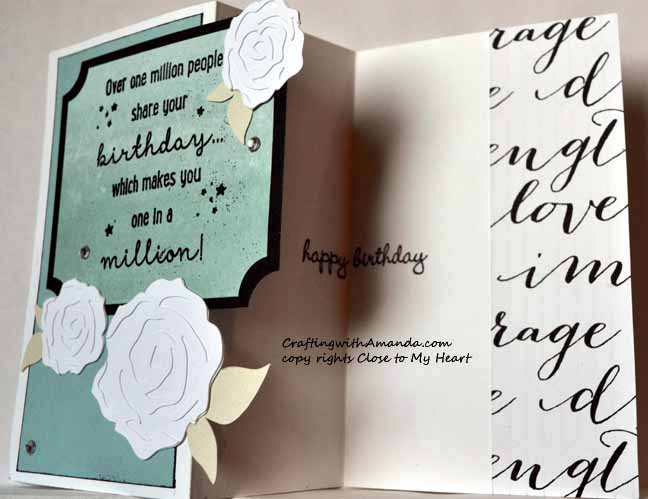
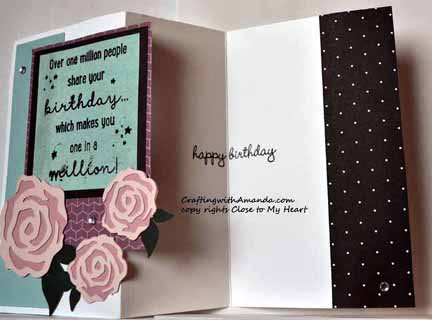
Basic Z fold cards.

I use Pinterest and good ol’ Google for researching different card folds & such.  I then compiled a list and tried to start with the basic ones,  and,  as we continue down this road build into more advance folding cards.

We started with “Fun Fold,” “Z fold” and “Double Z.”   I also gave everyone a blank notebook and some tips for modifying it so we could all create a place for all our samples and notes of all these great cards in one place.  I will have more on that in another post.

Just so you can catch up,  here is my sheet of instructions for the Fun, Z & Double Z folds.

Soon I’ll post my completed Christmas card for 2017.  It too utilizes one of our recent folding techniques.

Happy Crafting!


October Club fold part two: Double Z fold Card

And the folds keep on coming.   We did both the z fold and this double z-fold in October.  Many of our normal attendees weren’t able to make it,  but they all got caught up at the craft retreat that started the next day.

Once you have mastered the z-fold,  I highly recommend the double z-fold.  It takes a little more time,  but so worth it.

(This photos was found on google. )

Double Z-Fold: The trick to this to ensure that it will always work is the middle of each fold is the same length. Here is the fold measurements for a standard card (4.25 & 5.5). All measurements are from a 8 ½ x 5 ½ card base.

Base: Score at 2 1/8 & 4 ¼,

Top: Trim second base (5 ½ x 8 ½) to height desired and cut to 7.5″ in

length, then score at 3 ¼ and 5 3/8.

Attach top base to bottom base by aligning the 2 1/8″ section to the right edge of the base and glue that in place. Fold the base and then put glue on the back of the top that will overlap the front of the base.

Happy Crafting!


October Club Fold Part One: Z fold Card

Well,  second installment of fun folds from our local club night.  If you missed the first fold,  you can find it here.  I will be doing a series of card folds,  and have an idea for putting together  samples of each in a book.  I don’t know about you,  but I find if I have a physical sample with instructions at my fingertips,  I am much more likely to use the different folds I’ve learned.

Our next fold is the Z fold card (which will be followed next week by the double z fold card).

Again,  I don’t have photos of my samples to show.  I made them,  but need to set up a photo session with my cards.  🙂  So,  I turned to google and found this.

I don’t know if her card will fit in a standard envelope,  but if you followed any of the samples in the instructions,  they will fit.  🙂

Here are the instructions:

Z-Fold: You can fold your card base in any configuration that works for you. Here are some measurements for a standard card (4 ¼ x 5 ½ ).

All measurements are from a 8 ½ x 5 ½ card base.

Option 1: Score at 3 3/8 & 5 ½

2: Score at 2 3/4 & 4 7/8

3: Score at 1 ¼ & 4 ¼

Decorate as desired

Happy Crafting!


Folding Fun Begins now.

In September I decided that our club night group needed something different.  We have mastered the creative insider guide card kits, know lots of different techniques and our scrapbooks are continuing to grow in pages.  What to do,  what to do?   Fun Folds to expand our card variety!

First up.  Joy fold.

(Found this sample on Google.  There wasn’t any information from where it originated.)

Love this card.   You can trade it up by making the “mini card” that folds on top different shapes.  Hearts, Starts, tree, oval. . .   Sky is the limit.

Sorry that I don’t have any photos of my samples at this time,  but as I’ve been running with my hair on fire I thought I would post now,  and let you do some playing.   Soon I will make some crafting time and put together some samples and update the post.

Ready to create your own Joy Fold card?   Here’s the instructions.

Start with standard base (5.5 x 8.5)

Fold in half

Cut 2″ off front of the card (2 x 5.5)

Cut mini card base 4.25 x 5.5 and fold in half

Decorating tips:

If you are going to put paper on the inside of the big card base, put it on BEFORE attaching the mini card base. It’s also easier to decorate the mini card before attaching to the big card base.

No embellishments should extend past the fold on the mini card or it will be difficult to open the card and see the inside.

Some of the colors from the folds might show through, especially on the inside. If you want, ink the edges before you attach any papers.

Happy Crafting!


Card Workshop Video Week 5

This video shows you how to cut papers from the guide below,  and walks you through my processes for using up scrap pieces to create cards.   I hope you enjoy!

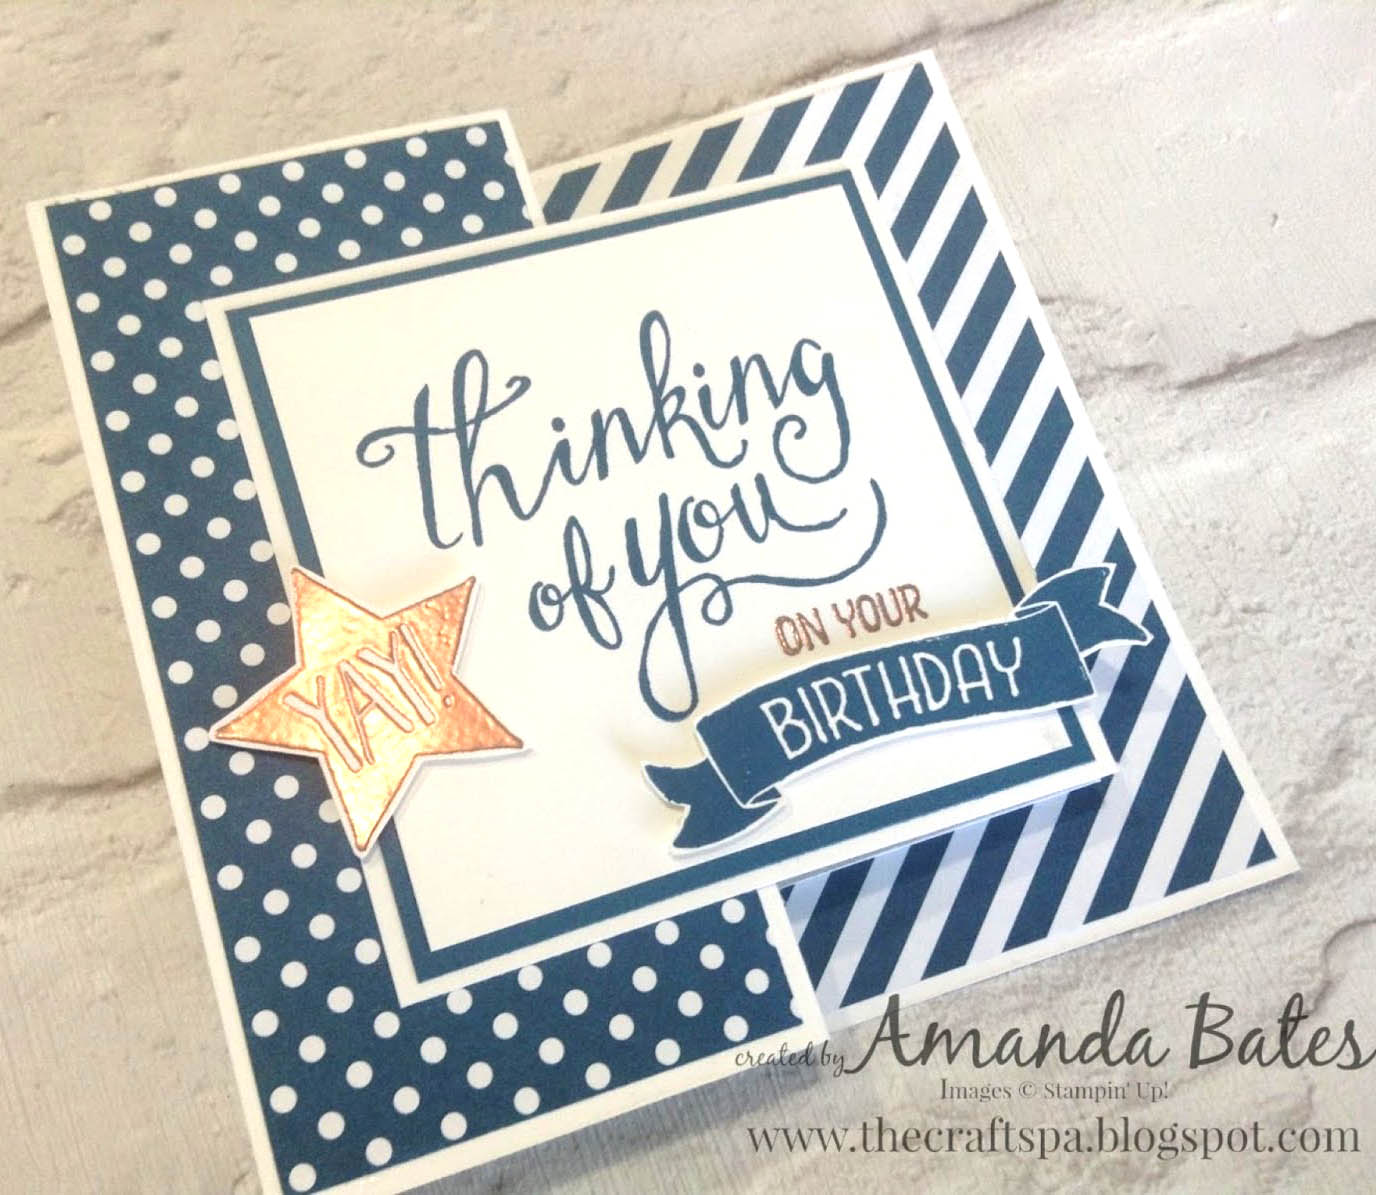
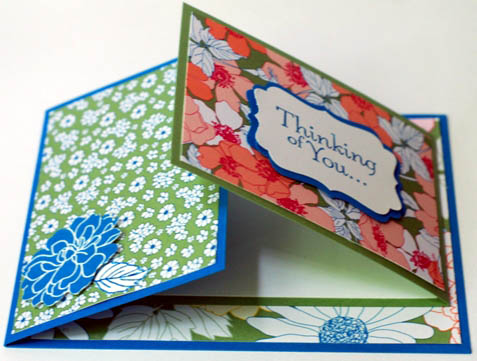
Unfortunately I gave away the cards I made in this video before I took photos of them.  Opps!

Happy Crafting!