Well, here they are. Most of these are probably familiar to you, but there are always new scrapbookers every day so maybe this will help someone. Also, as my friend once said. “When you do more, you can do more and you’ll have more.” What she meant is the more techniques you use on a regular basis, the more techniques you will do without even thinking about it, then with the basics masters you’ll be able to learn more techniques, expanding upon what you already have in your bag of tricks! 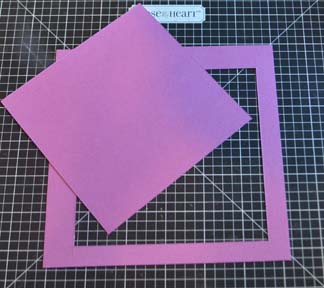
First Tip/Trick is a paper saver.
Some of the new CTMH paper packs have colors that are exclusive to that paper. This is great in that we can stay trendy with our colors, but this can also pose a challenge as we might run out of a particular color and don’t want to purchase another paper pack for that one sheet. To help stretch my exclusive cardstock colors from a kit, if I’m using it for photo matting, I’ll cut the size I want, then remove the center to be used later. In this example I cut a 1/2″ frame for my photo to be placed, then kept the center to use later. 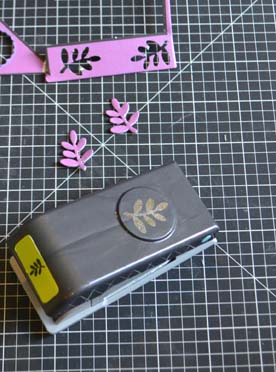 You don’t have to be exact on your cutting, just make sure your photo will overlap all sides.
Another paper saver is using the left over scraps from dimensional elements and punching out shapes to use later. These were punched from the edge of the Laughing Lola Dimensional Elements.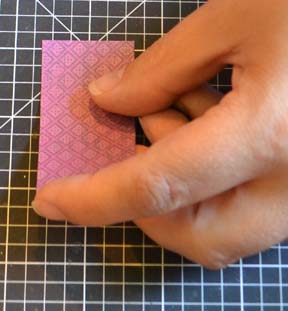
Do you know how to cut ribbon ends on paper so they end up being centered? Here’s what I do.
First, as I often use scraps for my little do dads, they are rarely an even inch measurement. To work around that, I center the paper on my cutting mat grid. This allows me to clip a line up the center of the paper. 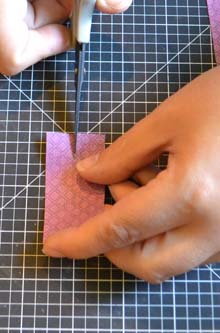 It doesn’t matter how far you clip as you will be
 cutting from the corners to the top of that line.
So, pick up your paper so you can see it and starting from the bottom corner angle your scissors to end at the top of the line you just clipped. Do that for both sides.
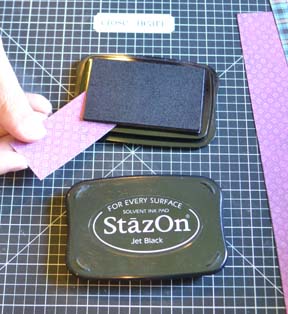
I often like to ink the edges of my paper to give it some depth. Sponges can’t reach all the way into the corner, and I can’t be bothered to get out a cotton swap, so I use the corner of my ink pad. you might need to push your paper in at an angle (unlike this photo where it just worked out perfectly).
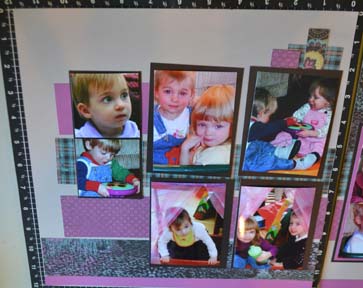
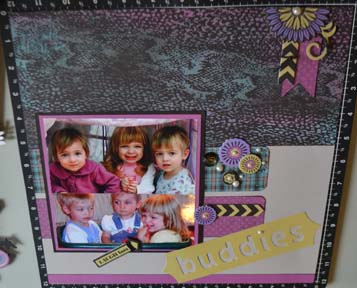
When I do a scrapbook workshop, I strongly encourage people to dry fit their layouts. This will save many embellishment opportunities as well as give you a chance to “tweak” it to make it your own. This is my layout not glued down. I then decided I want to ink all the edges of the papers and the base page, cut the ribbon ends for my cluster in the top right corner, and rounded the corners of the strips poking out from the left of the photos. I will also point out that the original pattern called for 2 x 2 photos on the left and I just couldn’t cut mine down that much so I used 2.5 x 2.5. It meant I had to adjust the mat size for under them, but I don’t cut any of the photo mats until I’m doing the dry fit, so it was fine. I’ve cut so many photo mats and not used them as my photos didn’t match exactly, that I now mark in my books which pieces are mats and I don’t cut them when I am cutting the rest of the papers. The pattern used on this was the workshop brochure from the Laughing Lola workshop on the go scrapbooking kit.
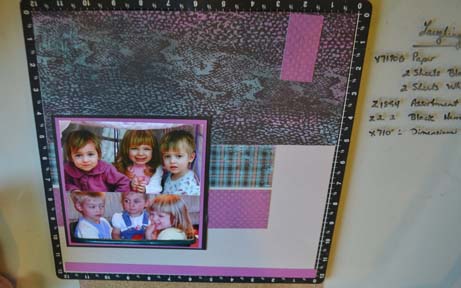 The right side is also dry fit together. See the mat that has the center cut out of it? I have recently started double and triple matting and I love the look. Soon I hope to shake things up and double and triple mat and twist them too! Might be a little adventurous for me, but when I find the right photos watch out!
See my list of what products I used? (on the right) I had an old desk from my Grandmother that had this on it and when we moved the desk out of the house I didn’t want the glass to break so we put it on my crafting table. It’s actually been a great addition. My four year old will come and draw with dry erase markers while I work and I can make a list of my products. If I use a permanent maker, I snap a photo, then clean it off with rubbing alcohol. By using a permanent marker I don’t have to worry about it rubbing off on my layouts.
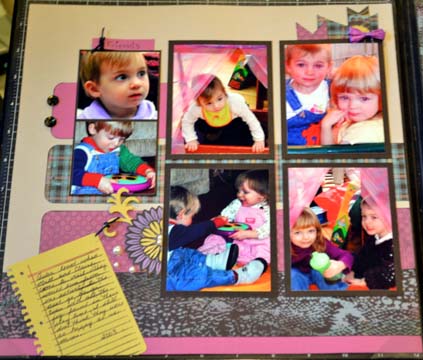
Here’s the finished layout.
The next Layout uses two single pages. The right side is from the Artbooking cartridge (p87) and the left used pattern #17 from the Make it from your Heart Vol2 book. I choose the Artbooking one because I was excited to do a Layout using the cartridge, and I choose the other because I had 2 photos left and it seemed like it would be a good fit. I didn’t ink the edges, just punched out different size circles, cut the word “Epcot” on the cricut out of the bronze glitter paper. I used the bronze glitter paper to balance the bronze strip on the left page. I embellished with the punched circles, sequence ribbon from the black mini medley and also used the glitter buttons and single sequence from the medley as well. Tips for getting your photos to fit just right in the overlay can be found here.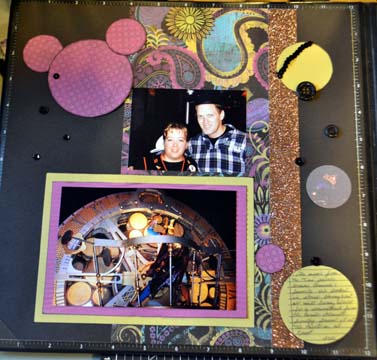
 http://www.craftingwithamanda.com/2013/08/09/laughing-lola-artbooking-layout/
Happy Crafting!

Yes, I agree, dry-fitting can be very effective in preventing “embellishment opportunities”! However, I still appreciate all of your tips and techniques for dealing with embellishment opportunities when they do occur. I also like seeing the embellishments created with the new Artbooking Cricut cartridge.