Archives for Cards

CWH All cards finished

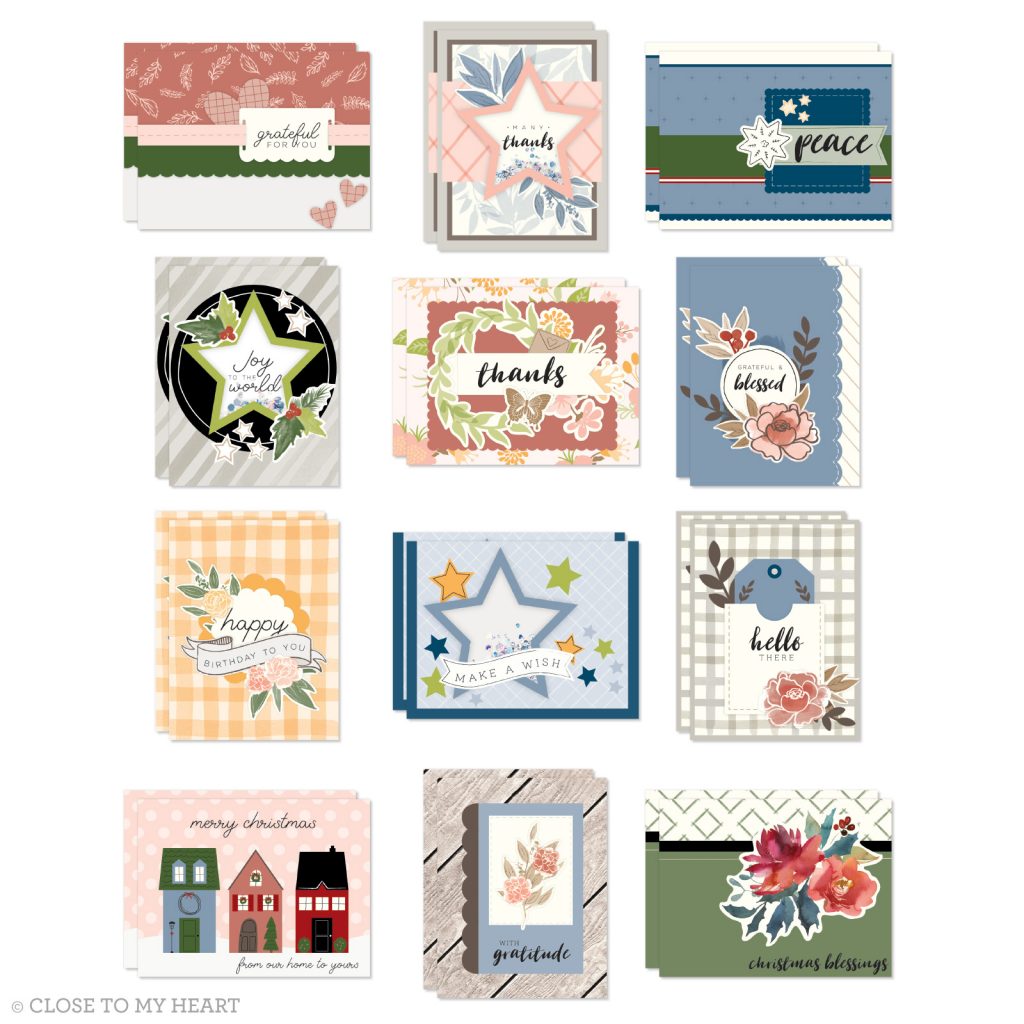
Less than $1.85 per card including tax and shipping for the yearly subscription is an a amazing deal. That doesn’t include any bonus cards or the stamp set, block & ink! Here are cards 3-12 plus the 3 bonus cards I made with a brief description of what I did to create the cards.

Card #3

All I did on card #3 was stylus emboss the big heart, one of the little hearts & curved the petals on the green flower. I used foam tape under the hearts above the sentiment. I also stamped the leaves under the green flower head.

Card #4

Card Number four was kicked up a notch with a couple of pink leaves and a palm branch. Splattered the sentiment base with the pink shimmer brush and added some sequence along with stylus embossing the foliage & flower.

Card #5

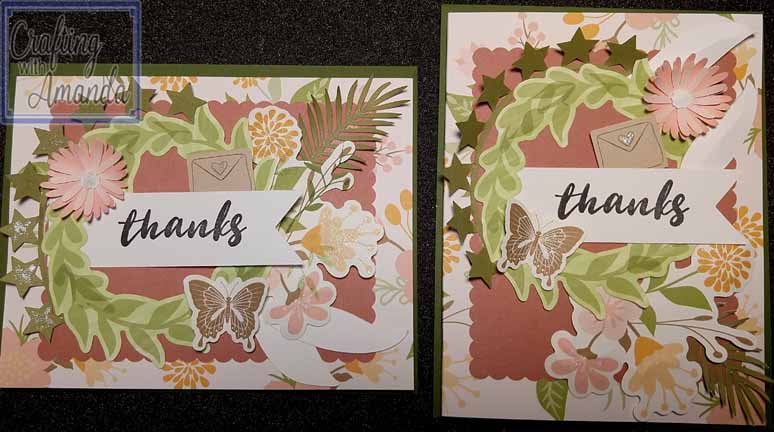
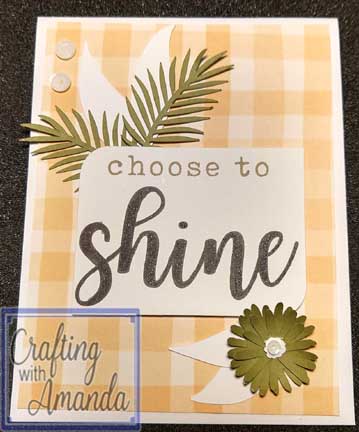
I added some fern color stars from the circles of stars along with palm brand and a peach flower head to card #5. Glitzed it up a bit with the clear shimmer brush too.

Card #6

Adding some second generation stamped leaves and a few of the cricut cuts was all Card #6 needed.

Card #7

I gave all the pre-cut die images from one card to the other card, and added all stars from the cricut cuts. Sprinkle in a few sequences and cards #7 are done.

Card #8

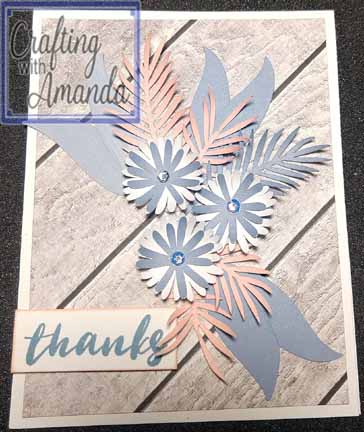
A couple of blue belle palm branches and a blue belle and white flower head joined a folded in half white leaf to complete cards #8. (Sprinkled with a few sequences too.)

Card #9

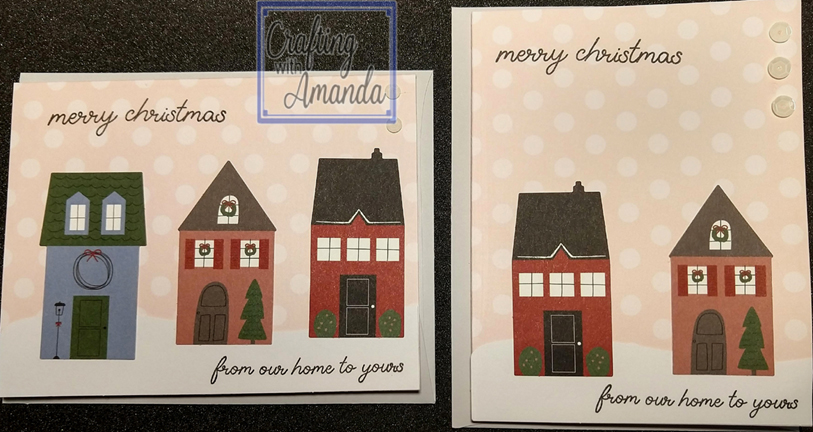
In the chaos of moving from room to room, one of the blue houses was lost for Card #9. Add a few sequences and rotate the 2nd card and it’s done.

Card #10

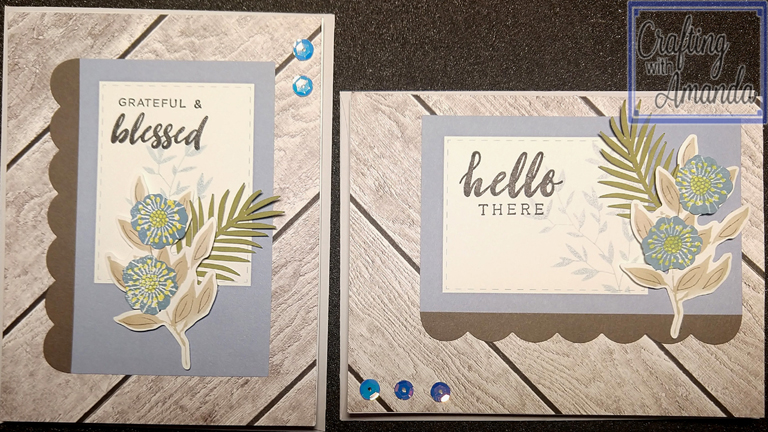
I took both of the pre-printed card bases and cut them in half. I added 2 white card bases and added the front panel on them. The flowers on the branch are not pre-printed, so I found a flower stamp and used the center to turn the blank die-cuts into flowers. (The other 2 panels will be used in the bonus cards later.)

Card #11

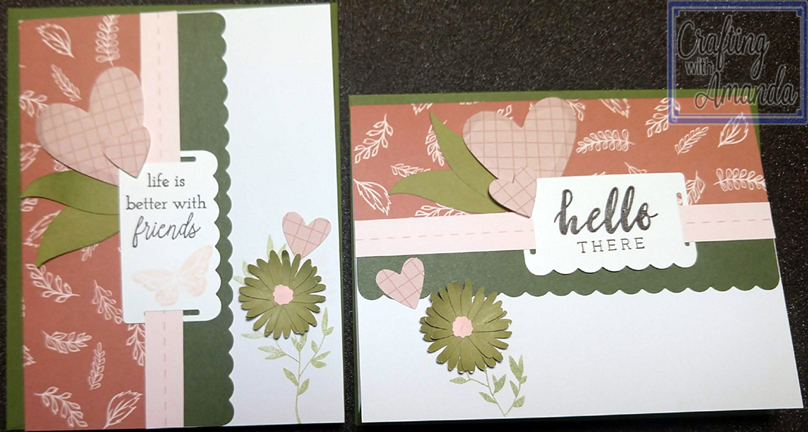
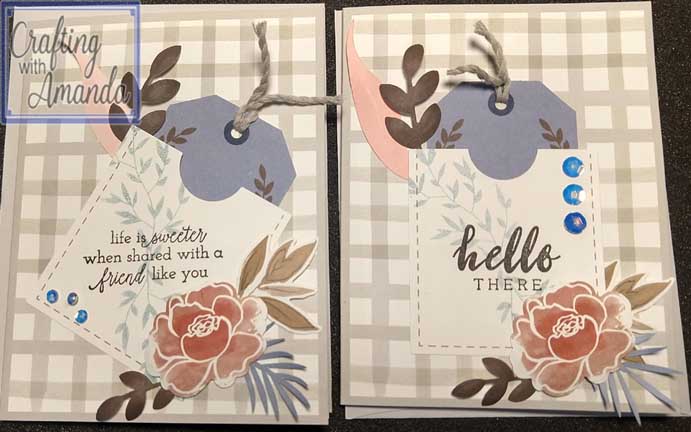
Card #11 was straight foward. Some stylus embossing on the flowers and palm branch, add some foam tape for dimension and sprinkle with a few sequences.

Card #12

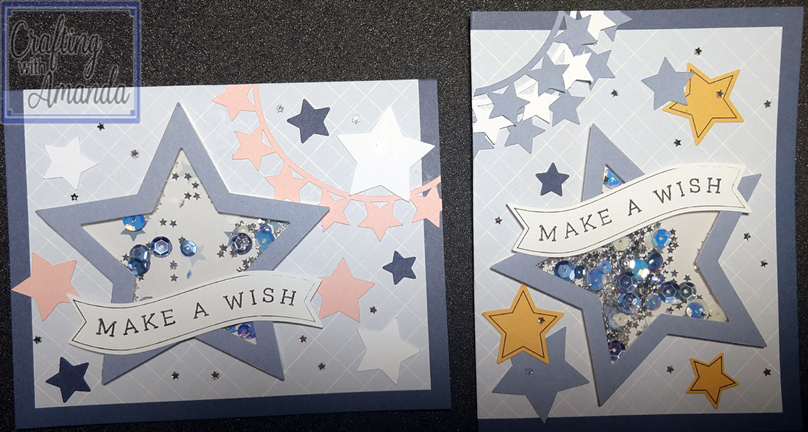
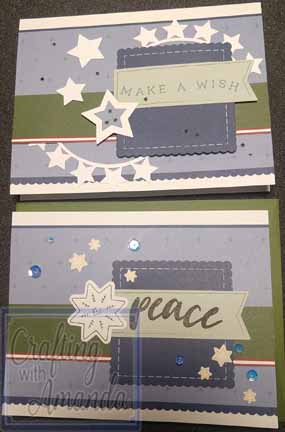
I put all the yellow stars with one card base and added pink & white to the other card base. Sprinkle a few tiny silver stars and both cards should be well received.

Bonus Card #1

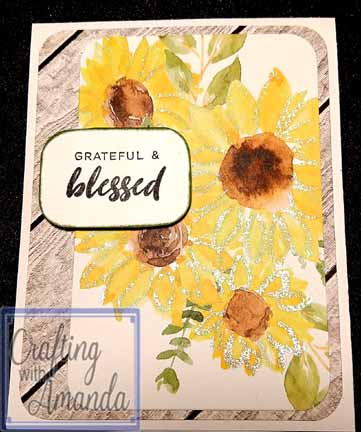
Rounding the corners from one of the wood card panels cut from Card #10, I then cut the sunflowers off of the notecard from Jeannette Lynton and added a foam taped sentiment. You can see a few of the petals were outlined with the clear shimmer brush.

Bonus Card #2

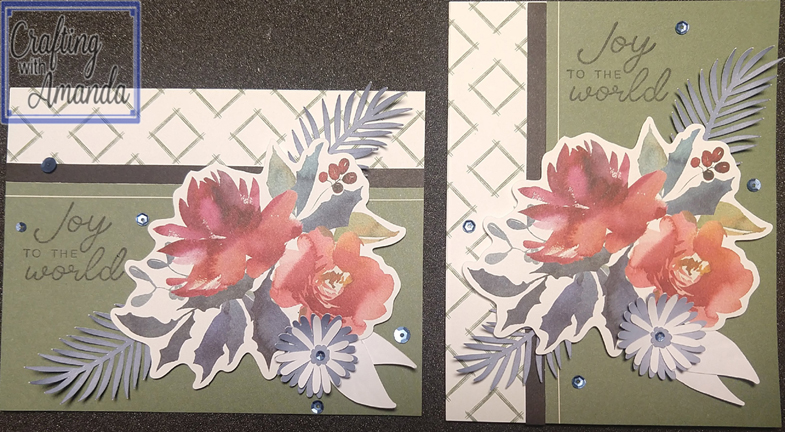
The sentiment also came from the notecard from Jeannette Lynton and so I added some of the left over palm branches and white leaves along with a great flower head for fun.

Bonus Card #3

This last card I took the last woodgrain panel from card #10 and made a cluster of flowers and leaves that were left over from the set of cricut images I added to this subscription kit.

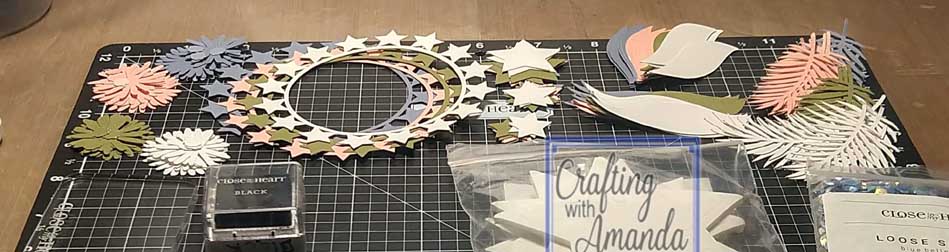
If you didn’t see the Cricut Image set in the previous post. Here it is. All the images come from the Flower Market cartridge and I used 4 half sheets of 12×12 in blue belle, peach, fern & white daisy.

Happy Crafting!

Craft with Heart (CWH) Cards – unboxing & Cricut additions

After unboxing the Craft with Heart Cards, I had an idea of how to Amanda-ize them using Cricut design space and the CTMH Flower Market Image set.

Link to design space file.

https://design.cricut.com/landing/project-detail/5f551f93719d87115c18729e

Use the link above to quickly cut out the extra images I created for the CWH cards. In my set I used four 1/2 sheets of cardstock. One each of Blue Belle, Peach, Fern & White Daisy.

There will be a series of videos showing how I assembled the cards and used the extra images. Hope you enjoy!

Happy Crafting!

Distress Oxides – Learning

I have long admired those paper artists that are able to pull off mixed media or the grunge look and create something incredible. I struggle to put layer upon layer and hide most of what I did previously and I think because of that I miss the mark with these art forms.

There are ladies that create amazing cards with ink blended backgrounds and I have tried and I have been able to teach others, but my own work did not soar as others did. All that being said, I think Distress Oxides just might enable me to do some creating of my own!

Learning new techniques is a passion of mine and I have been told I dive into with scientific methods. So of course the first thing I did before even opening one of the distress oxide ink pads was to do some research. I watched youTube videos, read what Tim Holtz had to say about the ink and talked to my oldest child who is an artist.

Knowledge in hand, I dug out some paper, tools and a few different mediums to learn how this hybrid die and pigment ink, that reacts with water, would act with different preparations of papers.

I had received a nice set of watercolors for Christmas along with a Watercolor Ground. So I took the ground, borrowed a jar of Gesso from my in house artist and under the recommendation of my eldest grabbed a bottle of basic white acrylic paint. Taking these three mediums, I went about applying a thin layer to 3 different types of white cardstock. The YouTube video goes into more details.

I learned a lot. First, the watercolor ground prepares cardstock to be able to withstand water-coloring and allow more playing with the colors before the paper starts to pill and gives a nice texture to the regular cardstock. It does not however create a good environment for trying to achieve smooth ink blending as the texture works against that. The Gesso and the Acrylic paint however both made blending the inks easier and I felt like if I can do it, anyone can. Plain cardstock wasn’t as easy to get a seamless blend, but I did manage it.

Now that I had played with the distress oxides ink, it was time to see what water did to it, and then find ways to apply the water in different patterns. The card at the very top of this post is my favorite. I sprayed the back of a stencil and pressed it on the inked cardstock. You can see the details and I really like it. I feel it could be a gateway to adding more textures and layers.

I even got out my crimper to add some texture behind the feature imagine. If I would have thought of it, I should have ripped the crimped cardstock to really kick it up a notch! Maybe next time.

Here’s another card I did. I pulled matting cardstock and the stripe of yellow for the background along with the black cardstock scrap to balance the stamping of the flowers. This is one of the samples that was sprayed with water and created all the faded water marks.

I’m looking forward to creating more inked backgrounds and finding new color combination. What is your favorite thing to do with distress oxides? I would love to try another new technique!

Happy Crafting!

New Core Product Catalog

Have you received your free copy yet? Any order you make with CTMH will include the new core catalog & and September/October idea book. But in the meantime, here are some of the great things you may find once you get your book!

New Color of the Year! Blue Belle
Craft With Heart Cards Sept – Dec 2020

The subscriptions are great. You can make them just as they are designed, or modify them to be exactly what you need!

September Craft with Heart – Scrapbook
October Craft with Heart – Scrapbook
November Craft with Heart – Scrapbook
December Craft with Heart – Scrapbook

How great would it be to have a year in review all done before the summer’s end? Two double-page layouts arrive at your house. Add some adhesive and photos and you have a complete album!

New ink colors!

Before I wish you happy crafting. I have to share one more new product and a card I made when I was able to play with them!

Distress Oxides!

Happy Crafting!

Quick Card for Club Project

Back before our family moved to California, and then before the Coronavirus was an everyday concern, I hosted a free monthly crop. Ladies would come and work on their own projects during the day and in the evenings everyone would be given the materials for a project. Often the project was a card workshop, but sometimes we did home decor items or learned new techniques. We have all missed this, and I have started hosting zoom chat & crafts for everyone in my VIP group. (Got to Facebook https://www.facebook.com/groups/CraftingwithAmanda and request to join)

This month I decided we needed to try and do more together and I designed this card for our third Thursday chat & craft.

Aug 2020 Club Project

I originally designed this card for a color challenge and a scraplift challenge.

Color & Scraplift Challenge Cards

I used the August 2020 Stamp of the Month for all the background stamping. It was fun doing some random stamping again!

I did a video of how this card came together and you can check it out on my youtube channel. https://www.youtube.com/channel/UCEkXBGuVJcxeCQTBaP6FGkQ?view_as=subscriber

Do you recognized any of the shapes? They all came from the first Close to My Heart Cricut Cartridge, Art Philosophy. I think this card would be great for any occasion. What would you use it for?

Happy Crafting!