Workshop On the Go

Gypsy Card Workshop & .gypsy files

My Mom is an amazing woman.  She has always embraced technology and was quick to use design studio with her Cricut Expression machine.  When she learned about the gypsy,  she got one of those and quickly fell in love.  I wasn’t sold on the cricut line as I sell CTMH and wanted something that would help me cut the stamped images.  I looked into the Sure Cuts A Lot and Makes the Cuts and decided there was too much grey area for my comfort and researched other cutting machines.  I ended up purchasing a machine that allowed me to scan my stamped images and it would cut that exact shape/size.  I was in heaven.

Then,  CTMH had to jump into the Cricut Cartridge wagon and I had to have a cricut.  Once I got the first CTMH cartridge Art Philosophy I was impressed with all the great things I could cut and with a little imagination I could do so many cool things!   I did think I was wasting time when I wanted to do many images at different sizes, but I worked my way around that problem too.

As we do with family,  I asked Mom to watch the kids for me so I could go to a scrap camp.  We arrived a couple days before the camp to settle in and have some fun with grandma.  I had a camp roommate project in mind and as I knew Mom had a cricut I packed my paper & tool bag ready to create some cool gifts in the evenings before camp.  This is when I fell in love with the Gypsy.  Mom is fortunate enough to have a summer place and a winter place.  She doesn’t carry all her stuff back and forth, so her cartridges were only on her gypsy and I would have to use it to create my gifts.  After very little time and a few pointers from Mom,  I was designing and cutting using the gypsy.  Now I wanted one, but the practical side of me rebelled against the price tag.   Patience paid off and I found a used gypsy with some cartridges already loaded on it for a great price.  (Part of the cost was covered by bartered crafting supplies!)

CraftingwithAmanda.com .gypsy files
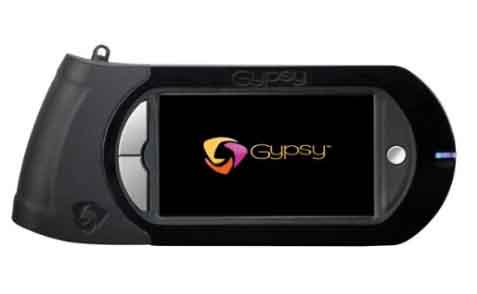
Jumping ahead 4 years, I use the Gypsy for all my workshops and in day to day personal crafting.  It’s so nice to have all the cuts that I made for a workshop sample layout all ready to go when the ladies are here.  We just load their paper and presto,  the cuts are exactly the same.    It also means that they will have the same amount of paper left that I did so they can create their layouts the same if they want.

Why do I share all this with you?   This winter was strange for many of my ladies.  Some were out of town taking care of  family,  other’s left us and the snow for a while and headed south,  and a couple who did stay in town were also dealing with family health issues, or the occasional snow storm prevented us from getting together.  As we were scattered to the winds,  it was hard to have everyone order the workshops at the right time.   Wanting to have a workshop with my gals,  I decided I would create one of my own using the bulk papers from one of the new paper packs.  (At that time the new seasonal book had just come out so I choose the Heartstrings paper pack.)  I got out my Wishes book and my gypsy and came up with these three cards.

CraftingwithAmanda.com Gyspy card workshop CraftingwithAmanda.com Gyspy card workshop CraftingwithAmanda.com Gyspy card workshop
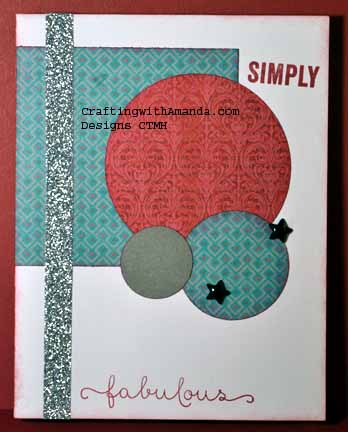
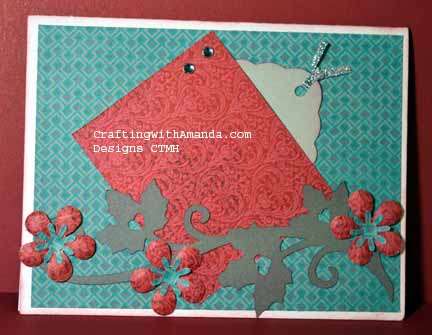
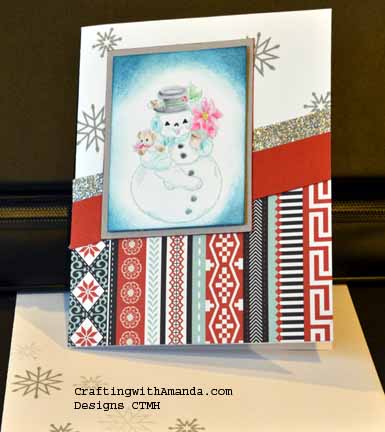
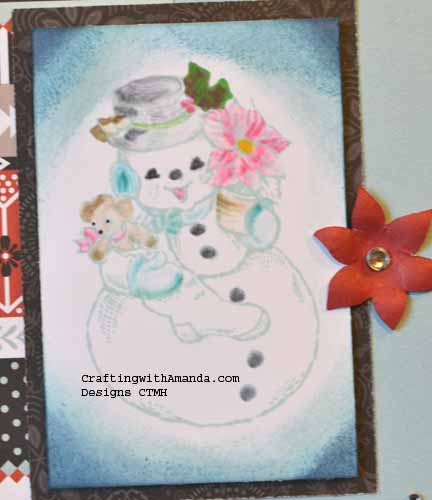
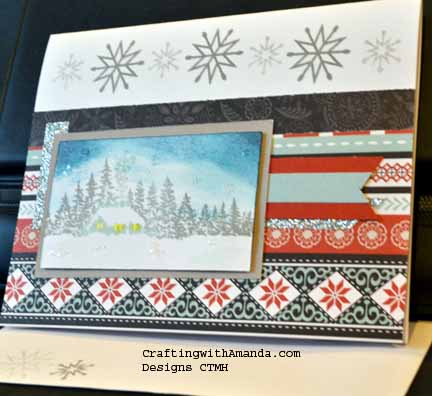
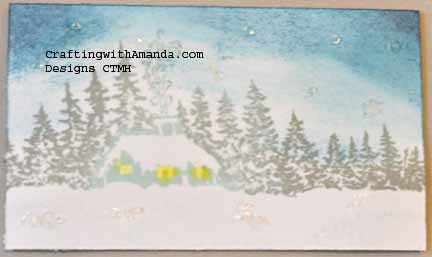
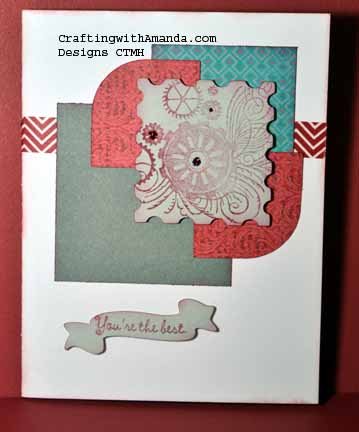
The top card (card #1) is from page 53,  the middle card (card #2) p89 and the bottom card (card #3) was inspired by p 97.

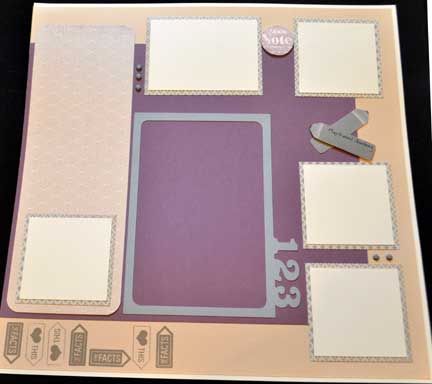
Each lady would make 5 of each card and have 15 cards to take home at the end of the workshop.  The gypsy files are set up to cut for 2 sets of workshops, so if you cut all the different sheets you will have pieces to create 30 cards!   There is also an instruction file that you don’t really cut,  but I use it for instructions as there are some simple squares and rectangles that you can cut with a straight cutter.  I think I limited myself to the Artbooking Cartridge & Art Philosophy.

Here are the files.
Heartstrings Cranberry
Heartstrings Neutral CS
Heartstrings Dark CS
Heartstrings Other Cut Info

Happy Crafting


Snowhaven Workshop – Twist

Hi Everyone!

Here are the Snowhaven cards that I created using the guide from the workshop & adding the Christmas Post Stamp Set

snowhaven3

After I stamped the snowman, I did trim the sentiment & the mat.  I then sponged the edges in glacier, Indian Corn(flower*) Blue, and Outdoor Denim inks.  To color the snowman, I used our wonderful Shinhan markers!  Instead of coloring directly on the stamped image, I made a spot of color on a block and picked up the color on the blender.  Trying to keep in mind where I wanted the darker areas, I colored those first when the color was it’s deepest, then blended out to the edges.  Hopefully there will be a tutorial in our future!

snowhaven mod

This is the close up of the snowman from the first card, and I’m not sure where the photo went, but as it is very similar to the workshop card, just changed the sentiment to a snowman, I am not going to worry about it!

I did create the pointsettia from the artist cartridge, added a little bling to the middle and shaped it with embossing stylus.

Here is the second card.  In the workshop, they used the black side for the bottom portion of the card, but I liked more color.

I rock and rolled inked the house in the trees starting with glacier then rolling the tree line in Slate.  Just like the snowman, I softened the outer edge with sponging.

snowhaven2Here is a closer look at the stamped image itself.  Are you wondering how I got the lights in the windows to look like they are glowing?   Well,  wonder no more.  I used a white chalk marker to color in the windows, then used yellow chalk on a cotton swab to make them glow!  I used this on a Christmas tree too and it really makes the lights look like they are shinning.

snowhaven2a

One of the main reasons I changed up the stamp set was so that I could have some winter/Christmas thank you notes for the kids to use.  I’m quiet pleased with how these look.

Happy Crafting!


Glimpses from the Weekend

It’s a new week.  I’m not sure why the Friday post didn’t get updated until Monday, but there it is.

Had another great weekend talking with creative ladies and seeing some beautiful artwork.

I might not have finished the samples for even one scrapbook workshop, but  I was pleased with what I managed to get done.

Scaredy Cat 1lt


This Layout is from Magic pg 28 (I think).  I cut the branches out of black glitter paper using the Artfully Sent Cartridge.  (Not just for cards!)

Scaredy Cat 1rt


CTMH glitter paper cuts beautifully too!

Here is the right side of this layout.  I don’t have a title yet, but I love the little tassel on the hidden journaling spot.

This next layout embraces the fun of the Scaredy Cat paper.

It too comes from Magic.  (I think page 48)

Scaredy Cat 2ltThe square house is on black tulle and was cut from one of the patterned papers.  I also cut the owl, three pumpkins, little monsters sign (right page) and spider web too.

To ink the two tone “HALLOWEEN” I used sunset & thistle.  I inked thistle on the top of the stamp, then (because I could see through) I did the other part in the sunset.

Scaredy Cat 2rt

Really like the effect on this themed Layout.

I used a Gel White pen and made “stitch” marks around the edges of the slate CS and to highlight the photos on the right hand page.  It still amazes me what the little touches do to highlight photos!

Hopefully I’ll find some time this weekend to finish the floral pages and put together the third LO for this workshop.

Happy Crafting!

Amanda


Frosted Workshop Layouts

Yesterday we had a lot of fun at the Frosted workshop.  We started with laughs and ended with contented ahhh’s after we each enjoyed a paraffin wax treatment for our hands.

Here’s the Layouts we did.  We used the Artist Cartridge for the first layout, and the Arbooking helped with our photo mats on the 3rd set.

Feature Layout:

frosted1left Frosted1right


Next Layout I choose to add Blush Cardstock, but one of the gals choose Smokey Plum.

frosted2left frosted2right


I used the trees from the Frosted Stickease, and cut some more using the Art Philosphy Cartridge and pop dotted them over the snow covered stickease trees.

I chose a scallop with the trees cut out.  I then glued the frosted grey to the back and using a white gel pen created my own “snow covered trees.”

Frosted2trees

The last layout I wanted to create something that was not “winter” themed so that my gals could visualize this paper pack for something other than winter activities.  I really like how these pages came together.

frosted3left Frosted3right


The pencils on the bottom left corner were created by turning an arrow stamp upside down and inking up the backside of the stamp.  Then wiping the tip of the “pencil” across the ink pad to remove some ink, then re inking the “lead” of the pencil.  It was so easy and I love the results!

Happy Crafting!


Sarita Workshop sneak peak

Even though the Sarita workshop was last Thursday, I’m still working on finishing the layouts.  I don’t consider a layout done until it is album ready.  This means, titled, journaled and blinged!  On this last layout, I didn’t even have all the papers attached at the time of the workshop.

SaritaLO3left

I’m not finished with this page yet, but I’m definitely making progress.  If I could just get someone else to come in and cook, clean, do laundry and do the truck dispatch and the bookwork, I could craft almost as much as I want to!

My crafting weekend, that I host, starts Friday, so I’ve been busy doing preparations for that.   By the time I do sit down at my craft table, either my hubby needs to discuss plans for a new grain bin with me, or our children need some Momma time.  I know those days of the kids wanting to spend time with me are number, so I try and remind myself to embrace it!page3cornerbling

I cut the title using the Art Philosophy cartridge and welded the letters on the gypsy.  I could have cut a “shadow” of the letters, but  instead I pop dotted them.  I really like that look and might add some twine around some of the letters.  Here’s a close up of the one corner of “bling” I did get finished.  I cut apart the swirls so I could have more of a cascade effect.

Back to the last of my cooking for the weekend, then I will sit down and make my lists of what I need to pack in the cooler at the last minute, write my grocery lists and make sure I have everything I need for the projects.

Happy Crafting!