Here they are. The 10 cards we made at our September club night. I showed you my random stamped piece in this blog, so now you can see what I did with that custom sheet. 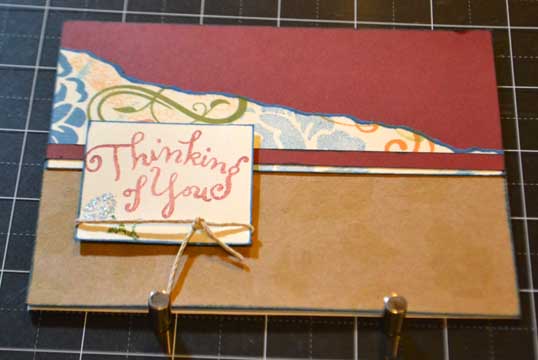 I’m posting them in the order that I created them as I believe there was a marked improvement in the cards as I went along and found my mojo. In addition to the 12×12 random stamped paper, we used a 12×12 color cardstock, 2 sheets of kraft paper (12×12) , a scrap of neutral for the sentiment. and 6- 5.5 x 8.5 card bases. On this first one I ripped the patterned paper and edged everything in Indian Corn Blue. Nice card, missing something I tried a tone on tone stamping of leaves on the kraft paper, but I wasn’t happy with the results the next morning.
 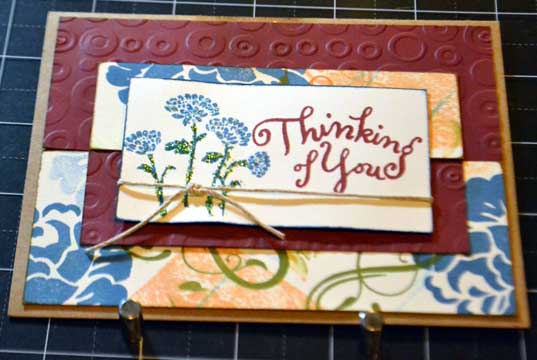 On this card, I got out my free cuttlebug (long story on that) and decided I would try embossing. I haven’t used the cuttlebug, and only own a few dies and embossing folders. The “words” folder wouldn’t work for the orientation of the card, so I tried the circles. It’s okay, but I wasn’t happy with the circles on my “fall” themed card. I loved how the glitz really helped “Pop” the flowers on the cards. (Wouldn’t do the stems again, but when you’re having fun, sometimes it just goes too far!)
  Changed the orientation on the next card so I could use the words. Better, but I still wasn’t happy. At that point, I decided to finish up some other duties and I could try again the next day. So, after getting the kids to school, and staring at my card pieces for a LONG time, I decided I needed a fall themed embossing folder. I knew I had seen something (probably on Youtube) about creating your own embossing plate, so I did a little research and after a few hiccups, I was giddy with my home made embossing folder.
 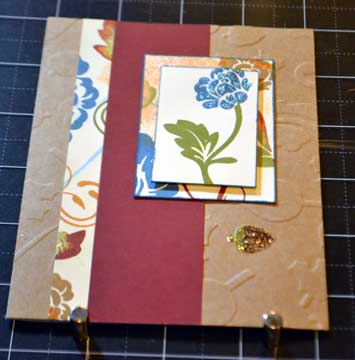 It’s faint in the photo, but I embossed the kraft paper. I even “highlighted” an acorn from the embossing with glitz glitter. (In hindsight, but probably would decide against the glitz on the acorn, but it was done.)
 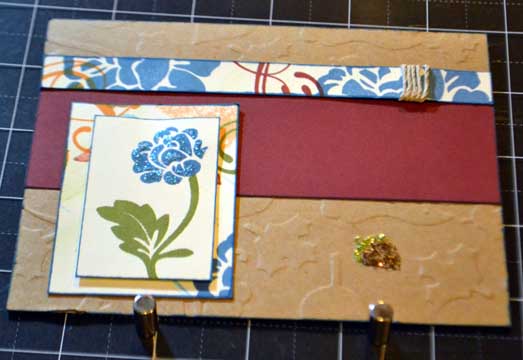 The pattern I created for cutting these cards, creates 5 cards from each half of the patterned and color cardstock papers, so after I “played” with the first set of five, I whipped together the next set very quickly.
 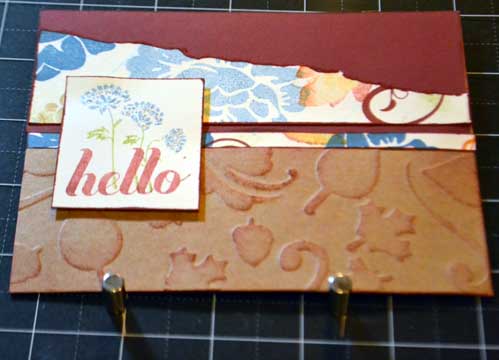 Added a little sponging to the embossed leaves, and even though you can’t see it on every card, the flowers all have a touch of glitz on them.
 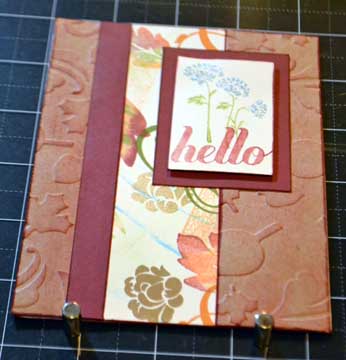 I used Barn Red on my edges and for sponging on this second set of cards. Just made them a little different than the first set.
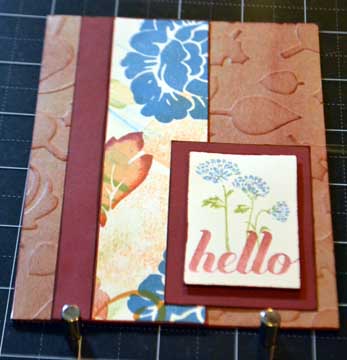
 I loved the second generation stamping of “hello.” Here’s a list of the other stamps and such I used. Swirls Around Happy Autumn Patterned Pennants Stardust Glitz
 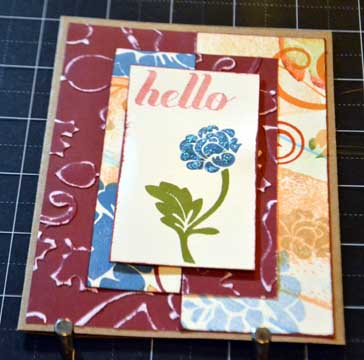 I tried sanding, and I do like this technique, but it wasn’t the look I wanted for these cards on this day! (Have you had days like that?) Happy Crafting!

Loved the random stamping. This technique lets one make customized b and t papers so that our cards and LOs are truly all homemade! Love the cards and have already used some of them.
I am looking forward to this weekend at CedarCampus. Amanda will be teaching us how to make our own customized embossing folders! You talk about making everything from scratch !!!!!
This was very helpful, thank you. I did the “Happy Autumn” and “Have a Splendid Day” (in Indian Corn Blue-wow love that color against the fall color scheme) theme for the fronts and am very pleased with how they came out
.