Archives for Tutorial

Distress Oxides – Learning

I have long admired those paper artists that are able to pull off mixed media or the grunge look and create something incredible. I struggle to put layer upon layer and hide most of what I did previously and I think because of that I miss the mark with these art forms.

There are ladies that create amazing cards with ink blended backgrounds and I have tried and I have been able to teach others, but my own work did not soar as others did. All that being said, I think Distress Oxides just might enable me to do some creating of my own!

Learning new techniques is a passion of mine and I have been told I dive into with scientific methods. So of course the first thing I did before even opening one of the distress oxide ink pads was to do some research. I watched youTube videos, read what Tim Holtz had to say about the ink and talked to my oldest child who is an artist.

Knowledge in hand, I dug out some paper, tools and a few different mediums to learn how this hybrid die and pigment ink, that reacts with water, would act with different preparations of papers.

I had received a nice set of watercolors for Christmas along with a Watercolor Ground. So I took the ground, borrowed a jar of Gesso from my in house artist and under the recommendation of my eldest grabbed a bottle of basic white acrylic paint. Taking these three mediums, I went about applying a thin layer to 3 different types of white cardstock. The YouTube video goes into more details.

I learned a lot. First, the watercolor ground prepares cardstock to be able to withstand water-coloring and allow more playing with the colors before the paper starts to pill and gives a nice texture to the regular cardstock. It does not however create a good environment for trying to achieve smooth ink blending as the texture works against that. The Gesso and the Acrylic paint however both made blending the inks easier and I felt like if I can do it, anyone can. Plain cardstock wasn’t as easy to get a seamless blend, but I did manage it.

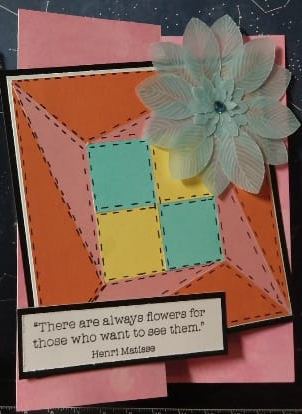
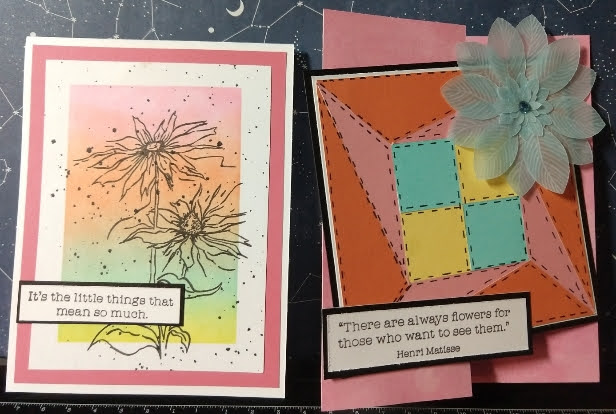
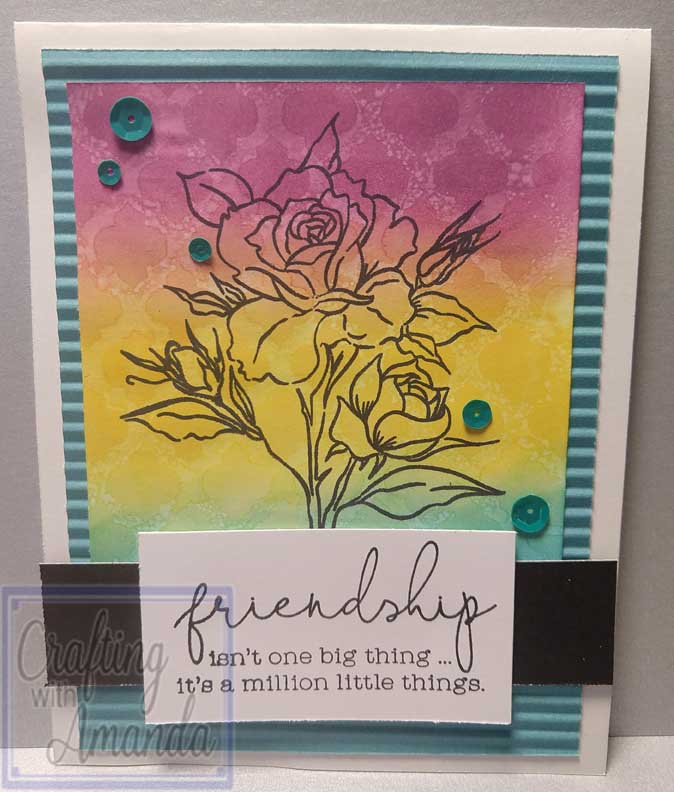
Now that I had played with the distress oxides ink, it was time to see what water did to it, and then find ways to apply the water in different patterns. The card at the very top of this post is my favorite. I sprayed the back of a stencil and pressed it on the inked cardstock. You can see the details and I really like it. I feel it could be a gateway to adding more textures and layers.

I even got out my crimper to add some texture behind the feature imagine. If I would have thought of it, I should have ripped the crimped cardstock to really kick it up a notch! Maybe next time.

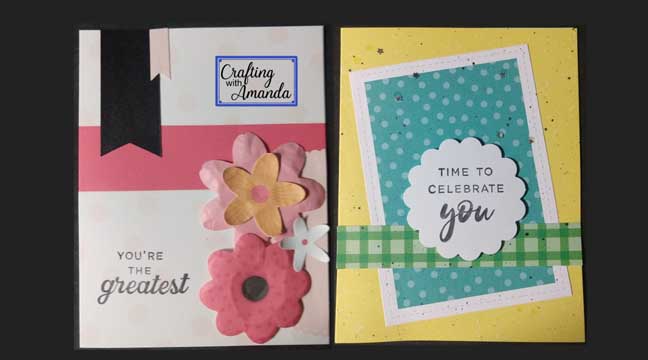
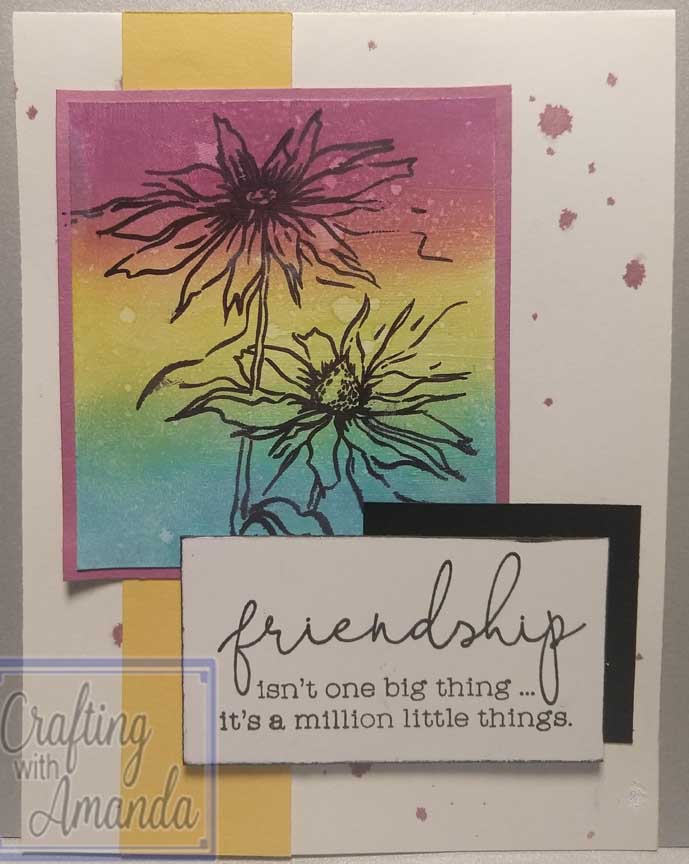
Here’s another card I did. I pulled matting cardstock and the stripe of yellow for the background along with the black cardstock scrap to balance the stamping of the flowers. This is one of the samples that was sprayed with water and created all the faded water marks.

I’m looking forward to creating more inked backgrounds and finding new color combination. What is your favorite thing to do with distress oxides? I would love to try another new technique!

Happy Crafting!

Timber Cards Process Video

Cards made with Timber Collection

With so many things going on in our world right now, it was fun to just pull out a brand new paper collection and just play for a bit.

I finally got to use the Operation Smile Stamp. (only available through the end of this month)

D1920 You Make me Happy

I really enjoyed not just playing with the papers, but also the markers & using up some embellishments too!

Here are some other cards using the Timber Collect made by the CTMH home office staff. (For inspiration)

I’d love to see what you create!

Happy Crafting!

Craft with Heart Cards 3&4

In the midst of a world of chaos, and I’m not just referring to COVID-19, I decided to take on the project of re-developing my CTMH business from California. In Michigan, we have a great group of crafty ladies and before all the safer at home orders, the group met at least once a month. This monthly gather was a day that could bring crafting, good stories, food, always fellowship, and also included a new technique, card fold, or some other project. We have all missed this. And I want to find that again here in Southern California

Along the lines of finding that again here, I had not chosen to make it a priority. When we first moved, there were other duties that needed attending. Now that we are all here, in a house that is under construction, (and because we hired a contractor, nothing we can do to help move it along) I found myself with time to craft. Thankfully I had kept SOME of my crafty tools and supplies out when we packed the rental house. So, what do I do with all this “free time?” I watch videos of other ladies crafting, videos of how to edit videos, make lists of things I feel I could teach others, and try to find fun new techniques for cards & scrapbooking.

Cards 3 & 4 from Craft with Heart Cards May-Aug 2020

One of the items that got “kept out” was the Craft with Heart subscriptions boxes that arrived as we were packing the house. Since I needed some material for making video content, and I had time to craft, wah-la videos of me making the crafting with heart cards in “My” style.

I’m learning lots and looking forward to learning more. If you have any suggestions for changes, video content, or other comments, please share.

Hope you find some time for fun crafting!

Facebook Live Workshops

Close to My Heart has been hosting workshops for the paper kits in the Idea books and special paper packs on Facebook. If you indicate you’re going you will be eligible for prizes from CTMH. You can find the list of upcoming events here https://www.facebook.com/CloseToMyHeartOfficial/events/?ref=page_internal

If you miss any of the live workshops, you can always go back and watch it in your own time. Some of the paper packs are available in the online-only section and are only there while supplies last. You can see what’s available here. https://craftingwithamanda.closetomyheart.com/Retail/Products.aspx?CatalogID=317

June 30, 2020, Brushed Bundle (CC6204) Brushed Workshop (This is the link for the instructions for the to make 3 double layouts, 1 single layout & 8 cards.

July 7, 2020, Stitched Together Card making Workshop Kit (G1206)

July 14, 2020 Stitched Together Scrapbooking Workshop Kit (G1202)

August 11, 2020, Summer Vibes Card making Workshop Kit (G1209)

August 18, 2020, Summer Vibes Scrapbooking Workshop Kit (G1207)

August 26, 27 & 28, 2020, Happiest Place Scrapbooking and Card making Workshops (TBA)

September 19, 2020 National Stamping Day Workshops (TBA)

Happy Crafting!

Color Challenge

Disclaimer: I currently only have access to a few of my stamps and many of those are retired. Most of the images I used are generic enough that you should find something in your stash, or currently available. If you need suggestions, leave a comment and I can help you find the right stamp for you.

I have seen many color challenges or inspirations in the past few years. I don’t know if it was because I already had a long list of projects on my craft desk, or because I like to pick my colors based on what I’m feeling that day, but I never felt the urge to participate.

After several weeks of feeling like I’m trying to scrap with my left hand tied behind my back. I was feeling this way because all our photos, except the latest home remodeling photos, are packed in storage along with most of my paper packs & tools. I saw this color challenge and decided to see if I could get my creative mojo back in line.

First thought, Hmmm, these are not my normal go-to colors. What should I do? I had just done a “retiform” card with some of my ladies. The version we did was just monotone, but why not try it with these colors.

I wasn’t really happy with it, but it was okay. . . remember this was going to be the first piece of my art that I would be sharing with this new California based group.

Next, I had been working on creating a new Cricut design. I had been watching some home improvement videos and saw a guy cutting tile. I thought it might be cute as a focal pattern on a card. So, using the 4 colors from the challenge, I cut 4 of the pinwheels and mixed the pieces. I was happier with this card.

Click the cricut to be taken to the project file for this “quilted tile.”

After a good night’s sleep, I had an idea. I would do a silhouette card and create a sponged background. This is definitely not my go-to style, but I already had the ink pads out from the retiform card, so I did it. Add a few splatters from a black shimmer brush and wah-lah a great card.

This is the photo I submitted for the challenge 🙂

I liked this last card so much, I have plans to make a few more renditions of it and send some happy mail!

Happy Crafting!