Archives for CraftyAmanda

August Club Night Project


JulySOTMcardoutsideYes, I have the project for next club night all figured out!  phew.  Now that CTMH and their supplier of our alcohol markers have achieved full manufacturing of them I am ready to teach a class on marker coloring.  Alcohol markers are very different from ink markers, and thus require a different approach.  I’m not going to go into details today as a tractor is warming up for me, but I promise to publish something later.  I hope to have a hand out for club night, so I’m sure I can link something on here once I get the write-up instructions done.

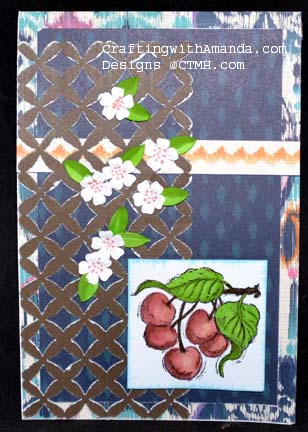
Now, on to the assembly of this wonderful card.  I used a piece of patterned paper from the new Sarita papers.  I cut it 4.25 x 5.5 then cut a .25 frame and flipped the inside rectangle over to create a matted effect.  I used the zip-strip from the top of the paper and cut a 4.25″ piece.  I put this over the patterned paper. Using the new Artbooking cartridge I cut the lattice out of chocolate cardstock. (I lent my cartridge to another consultant, so I can’t tell you the page number right now.)  I lightly sanded the lattice letting the white show through.  Using a 2×2 white daisy cardstock square I stamped the cherries using our black pigmet ink.  While I waited for the ink to dry (pigment ink takes longer, sigh), I cut seven 1/2″ flowers from the Art Philosophy cartridge p50.JulySOTMcardinside 
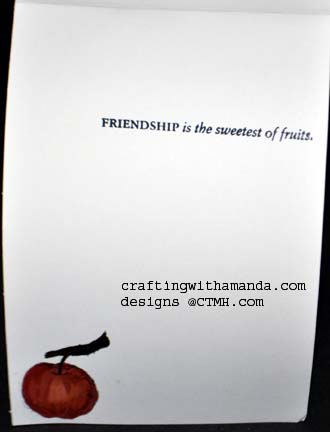
I also cut a branch with leaves on it p43 out of pear cardstock.  I removed the leaves from the stem and folded them to give them character, then put dots with a ruby marker in the centers of the flowers.  I use the rub on tool to cup the flowers, then turn each cupped flower over and again using the rub on tool rub only the center of the flower to make it have dimension.   (I’ll try and get a better photo of that for you.) By now the pigment ink had dried and I colored in my leaves, branch and cherries with pear, ruby, blush, and the blending markers.  (more on the technique later.)  I sponged the edges of my 2×2 square with sky ink and pop dotted it on the lower right corner of the card.  The inside of the card used one of the sentiments from the July Stamp of the Month along with part of the apple stamp.  (The card isn’t really bent, but I couldn’t get it to stand up for the photo.)

Hello Tweety

tweetcard

Can you tell I need birthday cards?  I’ve been making them almost exclusively lately!

This is a straight forward card as far as techniques go, but packs a punch with it’s design.  A fellow consultant and friend,  Erica, designed this card for us to create.  She used the Hello Tweety stamp set with Colonial White ink on a kraft cardstock strip.  We used our cricuts and the border from p65 of Art Philoshopy to create the white daisy edges.  Our card base was lagoon cardstock (4×6).  By varying where we started stamping our birds on the wire, we were able to create many different arrangements of the birds together.  I used sorbet string left over from an old sorbet mini medley pack, but bakers twine would work well there too.   Keeping with the theme of using up left overs, the flowers were from a grab bag I received at a crop.

We each created 4 of these cards, but varied the card color for the bases.  It was great getting four more birthday cards to add to my stash.  I really seem to be going through them now.

Hope you have a crafty day!


Home and Crafting again – Masking Technique

Well, I made it back from leaving the kid’s at my Mom’s house.  Her root canal got postponed a day, but I’m sure everyone will be just fine.  The kids loved going to VBS today, and were already looking forward to going tomorrow.

As the house is quiet, I decided to continue the assembly of the card sets from my May weekend.  (I’m getting closer to being caught up with my UFOs, unfinished objects.)

So, here it is.bearswithmasking

I used a retired stamp set, one of my favorites, called raccoon and friends. To get the bears to be in front of the mountains, I used a technique called masking.  I will try and explain what I did.  First I stamped the bears on a scrap piece of paper and trimmed closely around the image.   After I trimmed the image I used the two way glue and applied it to the back of the cut out piece.  I then stamp the bears in Chocolate ink on my project.  Making sure the two way glue had dried and was not repositionable, I covered the stamped image of the bears on my project.  This allowed me to ink up the mountains in outdoor denim and stamp them on my project.  Using the same masking technique as the bears, I masked the first (darker) mountain range and without re-inking the stamp stamped the mountains again.  This made them lighter in color (2nd generation stamping) and once again pushed them behind the first mountains.  I removed the masks from the mountains and the bears and proceeded to stamp the grass.  I used sponges to create the colorful sky.

sunsetsponging

Here is another example using the same sized pieces, but arranged vertically.  I used masking in a different way on this card.  I punched a 1/2″ circle out of CS and after swirling some honey ink, I placed the circle on the honey ink then used sponges to create the sky background.  After I was done and removed the circle mask,  I got a sun behind my silhouetted flowers.

I am squeezing in my crafting time right now, but soon I will start taking photos of the process (and use stamps that are available to order, sorry).

Have a crafty day.


Fun Day with Mom and the kids.

Started the day at my Mom’s. (Grandma’s fun house according to the kids.)  Eggs, toast, and peaches made up breakfast.  We then spend 3 hours at a family fun carnival in the park.  The kids played LOTS of little games and we all got our faces painted.  This was a first for Grandma!  She got a pink and purple butterfly, I got a blue butterfly, the girl choose a cupcake and the boy wanted to be a pirate!  I will post a photo after Grandma emails them to me.

I was supposed to be driving home tonight to get on a tractor tomorrow morning, but the forecast is calling for rain, so I will stay and help out with the kids a little longer.  Oh, darn!

After the carnival games and a quick snack we went the tents with the petting zoo and the pony rides.  Only $1 a ride and the kids LOVED it.  As I was thinking my trip was going to be much shorter, I didn’t come prepared with a camera, so I used the girls I-pod, and have to wait for her to email those photos too!

I should have some great scrapbooking pages just from our morning activites.

We returned to Grandma’s and took a water play break.  The kids had each picked a water “gun” as part of their prizes so they changed into swim gear and sprayed each other.  I decided since we had the water out, I would put my suit on and scrubbed my Mom’s outdoor table and chairs.  They cleaned up really well.  Still have another small table, but was pleased with my progress.

Once the table was done it was time to head to the zip line for the girl, then to the water park for all of us.  Now that we’re back, Grandma is getting ready for Bingo and the kids and I are going to do some grocery shopping and take advantage of having a KFC only 10 minutes away from us.  Grandma is one of the callers for Bingo, if she didn’t have a job I think she would prefer to join us for dinner.  We’ll bring her some back for later.

I will get some photos up soon.

Happy crafting.

On the Road Again

I’ll have to owe you a photo of the club night project.  We had a Life Expressions Décor representative come and do a make and take party for us.  It was a lot of fun. Some ladies did one sign, but several did two and a few even made four and five signs to give as gifts.  It was cool watching everyone go from tentative to confident with each brush of the paint brush.

Today I need to make sure my kids will have what they need to be at Grandma’s for a week.  Her community puts on a great VBS program and also has lots of fun activities to do around the park, so they should have a great time.  It’s a 6 hour drive when you include stops, so I better get a move on so I can have most things ready to go before the kids wake up.

Have a great day!